How to Create Blogger Slideshow and Play Slideshow on Blogger Posts

Blogger slideshow is excellent to share your photos on Blogspot blog. It is easy to do so,
Creating and Inserting a slideshow takes just very simple steps:

  • Select photos in PIcasa and ‘upload’ them to Web Albums 
  • Use Picasa Web Albums to create ‘Embed Code’ 
  • Copy and Paste ‘Embed Code’ to your Blogger or Live Writer 

The first step in creating a slide show is to select the photos you want, give your new Album a Title and then upload them to Picasa Web
Now go to your Picasa Web Albums, select your album and display the photos you just uploaded.  With your new album photos showing on the left hand side of the screen, look at the right hand window and click on "Link to this album". just as in below image


Apple _ iPhone 4s

The dual-core A5 chip delivers even more power. The 8MP camera with all-new optics also shoots 1080p HD video. And if there’s anything else you need,

Why Laptop Screen goes Black? How to Fix it


Laptop computers are designed to automatically shut down their displays under certain circumstances. If a few keystrokes or a restart can't bring the screen back to life, however, it may be evidence of a more serious hardware issue.

One of the most common reasons why a laptop screen goes black is because of impact damage. This can happen when the laptop is accidentally dropped or bumped into.

How To Get Original Windows XP for free?

Hey! Imagine You are getting Microsoft Windows XP for free.How cool is that. Till now someone can only think about it but we made it.Tricks-Tech blog is offering a free licensed copy of Windows XP to everyone.
Here is the method how to get this.

Activate windows 7 in simple 9 steps!


Here are some tricks to activate your windows 7.Read first and then apply.Cheers.

1-Install Windows 7 without Product Key

2-Complete Installation of Windows 7

3-From START menu, ACCESSORIES, run "COMMAND PROMPT" as admin
(Right click the "COMMAND PROMPT" icon, select "Run as Admin" from the sub-menu)

4-In Command Prompt (Admin mode) dialog, type

slmgr.vbs -ipk FJ82H-XT6CR-J8D7P-XQJJ2-GPDD4 (Windows 7 Professional)
slmgr.vbs -ipk MRPKT-YTG23-K7D7T-X2JMM-QY7MG (Windows 7 Professional N without IE8 & WMP12 (European Version))
slmgr.vbs -ipk 33PXH-7Y6KF-2VJC9-XBBR8-HVTHH (Windows 7 Enterprise)
slmgr.vbs -ipk YDRBP-3D83W-TY26F-D46B2-XCKRJ (Windows 7 Enterprise N without IE8 & WMP12 (European Version))

How to add Meta Tags to Blogger


Add Meta Tags to Blogger for Better SEO

What are Meta Tags?
Meta elements are HTML or XHTML elements used to provide structured metadata about a Web page. Such elements must be placed as tags in the head section of an HTML or XHTML document that provide additional information about your blog that is unseen by visitors but available to search engines. The meta description tag, provides a short summary of the page content. The keyword meta tags show the keywords and keyword phrases a visitor might use to find your blog.

How To Add Meta Tags in Blogger blogs

1-    Login to Blogger if not already logged in

2-    Go to Blogger Dashboard – Design – and click Edit HTML
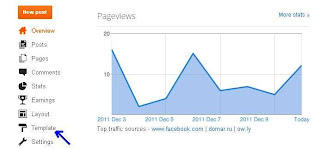
        For Blogger's new look Go to Template
3-     Click on Edit HTML
4-     Back up your template as a precaution by downloading full template to your computer.
        Check the Expand Widget Templates box

5-     Search(Ctrl+F) for the following code in the header at the top

                      <b:include data=‘blog’ name=‘all-head-content’ />

6-     Now paste the following code right after the above line:

               <meta content=‘ BLOG DESCRIPTION HERE’ name=‘description’ /> 
               <meta content=‘ KEYWORDS HERE’ name=‘keywords’ /> 
              <meta content=‘YOUR NAME’ name=‘author’ /> 
              <meta content=‘ALL’ name=‘ROBOTS’ /> 
              <meta content=‘blogger’ name=‘generator’ />

7-    Save the Template.

Here is a link which helps you to generate Meta Tages online freely

Mobile Codes for your Mobiles


Get free unlock code for your mobile and unlock your mobile


NOKIA
serial number/ purchasing date/ life timer
*#92702689#
Defalt code for resetore factory setting 12345
IMEI  *#06#
virus removing from memory card
*#7370# then 12345 or any other defalt code

SAMSUNG
LCD contrast *#2767*3855#
IMEI *#06#
Vibration Test *#9998*842#
Defalt code 0000 or 00000000

SONY ERICKSON
IMEI *#06#
To change Date and Time *#103#
Select the language *#0000#

CHINA MOBILES
Defalt code 1122
IMEI *#06#
Select the language *#0000#

How To Register Internet Download Manager Free

Free Serial Keys for IDM
Here is the complete step by step procedure for it:

First of all Download IDM 
Now disconnect your internet.
Install IDM on its default location [C:Program FilesInternet Download Manager]
Now go to C:/Windows/System32/Drivers/Etc and open hosts file with notepad
save after adding following lines in last

127.0.0.1 http://internetdownloadmanager.com
127.0.0.1 www.internetdownloadmanager.com

 Now enter registration keys

First name : MerCuRy
Last Name :1560985
Email : mercury1560985@gmail.com
Serial: 7G7QY-NZWKQ-23KRA-RAMQ4 

Note: Never Update ur IDM after registering using this key.

via: [TECH BYTE 4 U ]

For More Detail go to TECH BYTE 4 U

How to insert a table in blog post

There is no default setting for inserting a table in blog post. So for table inserting in blog post follow the following steps.

  • Go to new post in "html mode" 
  • Add the following code 

<table>
</tr><tr><td>C1 </td>
<td>Column 2  </td>
</tr><tr><td>C 1 </td>
<td>C2  </td>
</tr><tr><td>C 1 </td>
<td>C 2  </td>
</tr><tr><td>C1 </td>
<td>C 2  </td></tr>
</table>

This code will give you 2 columns and 4 rows.


Another Method to insert the table in Blog Post with table border 
Add the following code in HTML mode

<table border=1 cellpadding=0 cellspacing=0 height=100 width=100>
<tr>
<td> column 1 </td>  <td> column 2 </td>
</tr>
</table>

 This code will give you 2 columns and 1 rows.  Below is an Example of this code

column 1 column 2


If you want to increase number of rows or columns follow the steps


<table border=1 cellpadding=0 cellspacing=0 height=100 width=100>
<tr>  <td> column 1 </td>  <td> column 2 </td>  </tr>
<tr> <td> column 1 </td>   <td> column 2 </td>  </tr>
<tr> <td> column 1 </td>  <td> column 2 </td>  </tr>
</table>
This code will give you 2 columns and 3 rows.Below is an Example of this code


column 1 column 2
column 1 column 2
column 1 column 2


Adding <tr>    </tr> to increase the numbers of rows and <td>   </td> to increase the numbers of columns.
<tr> for row starting and </tr> for row clossing, similarly <td> and </d>

Popular Posts

Labels